You will need:
1 lamp base
1 drum shade
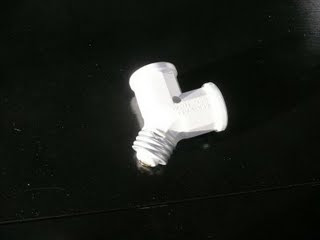
1 light socket splitter
1 set of chandelier loops (don't know the technical name for these, but they're used to attach a chandelier to a chain.)
Wire cutters
Silver spray paint
Chain to hang the chandelier
Pair of pliers


The first thing you want to do is cut the plug off. This is so that the chandelier can be wired, and so that you can slide things on and off the cord.

Next, you want to loosen the bolt on the very bottom of the chandelier that is holding everything together. (You may want to try loosening this bolt in the store before you buy a particular lamp. One of mine was very easy to get off and the other was a pain!)

Now slide everything off the center bar and wire. You should have something like this:

Now you want to start reassembling the light. The shade goes first, then the glass balls. I wanted the largest ball at the bottom next to the shade and the smallest at the top, but you could do it the opposite way, too.


Now you want to slide one of the loops on. I could only find these in gold, so I spray painted them silver to match the rest of the light. You should have a little bit of the center bar sticking out above the top ball. The loop will thread onto the end of the bar. Then pry a link of the chain open and attach it to the loop.
The other loop will go at the top of the chain and will screw onto the hollow mounting bolt that's part of the mounting assembly.
I saved the base of the lamp and to use it to cover the hole in the ceiling where the mounting bracket and wires are. Because it's clear, I traced the base onto a sheet of white office paper and cut it out. You'll have to punch a hole in the middle for the hollow mounting bolt to go through.


We chose to use a socket converter so that the light would have 2 light bulbs instead of just 1. All you have to do is screw it into the socket on the lamp and you're done.
As a finishing touch, you may want to add a piece of frosted plexi-glass to the bottom of the drum shade so you can't see up inside of it. We found a plastic ceiling light tile for a dropped ceiling and cut a circle the size of the shade out of it. It just rests on the lip inside the shade.
Then you're ready to hang the light! I can't help you here, since my husband did this part of it, but here's a site with directions for installing lighting fixtures.
 {Disclaimer, I did not write this tutorial and cannot take any credit for this creative idea}
Fellow bloggers, be brave. If anyone steps out there and tries this one out please let me know!


1 comment:
Oh wow - thanks for featuring my project! I'd love to see if anyone takes you up on your challenge! It's really not hard to do at all.
P.S. Your puppy is ADORABLE!!!
Post a Comment